How to Port Vodafone Prepaid to Airtel Postpaid? - Digiforum Space

Share
Facebook X LinkedIn Tumblr Pinterest Pocket Skype Messenger Messenger Viber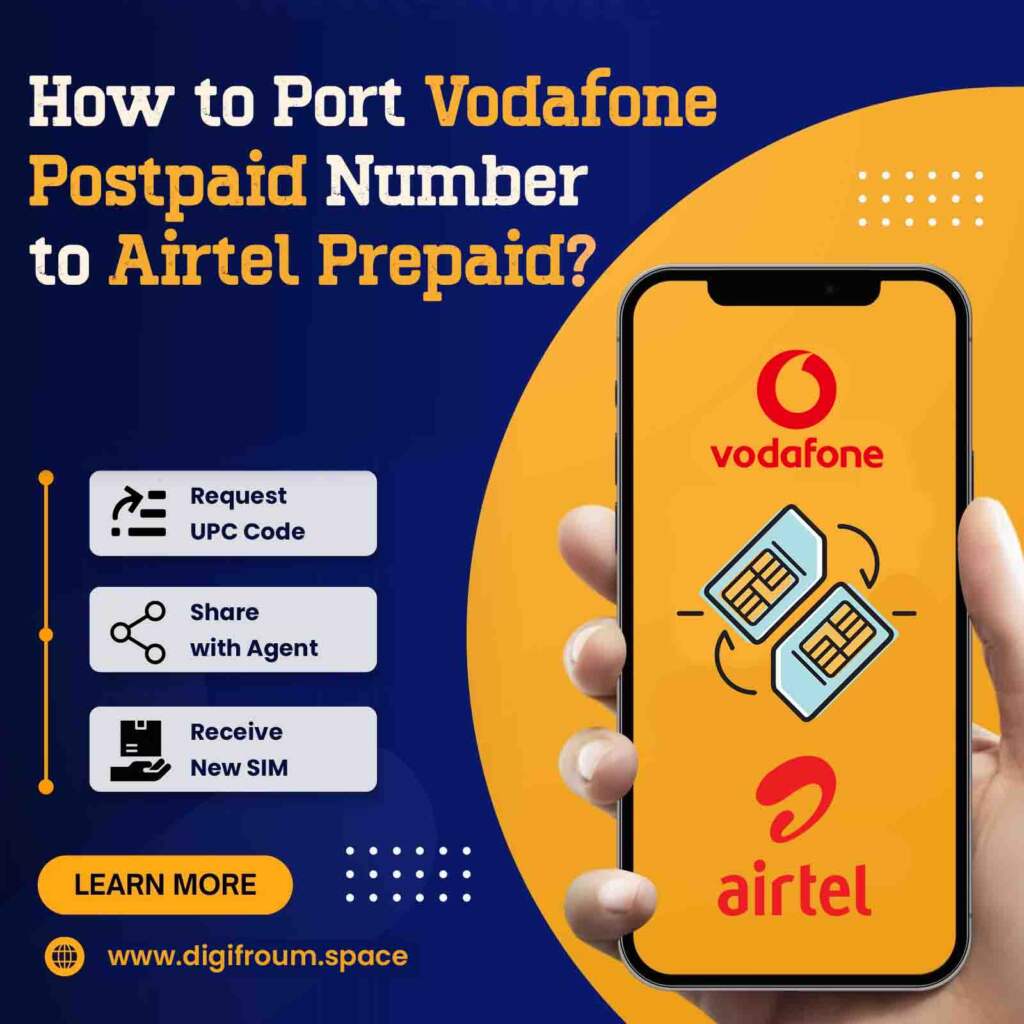
How to Port Vodafone Prepaid to Airtel Postpaid
In today’s modern world, staying connected is essential, and your choice of mobile service provider plays a crucial role in ensuring seamless communication. If you’re considering switching from Vodafone prepaid to Airtel postpaid, you’re in the right place. In this comprehensive guide, we will walk you through the entire process of porting your number from Vodafone to Airtel, providing step-by-step instructions, tips, and important information to make the transition smooth and hassle-free.
1. Why Switch from Vodafone Prepaid to Airtel Postpaid?
Before we delve into the porting process, it’s crucial to understand why you might want to switch from Vodafone prepaid to Airtel postpaid. Some common reasons include:
- Better Network Coverage: Airtel is known for its extensive network coverage, ensuring you stay connected in even the most remote areas.
- Superior Data Speeds: Airtel consistently offers high-speed data services, making it ideal for data-intensive tasks like video streaming and online gaming.
- Attractive Postpaid Plans: Airtel’s postpaid plans often come with benefits like unlimited calls, generous data allowances, and value-added services such as Amazon Prime or Netflix subscriptions.
- Consolidated Billing: With Airtel postpaid, you receive a single monthly bill for all your services, simplifying your financial management.
2. Preparing for the Porting Process
Before you initiate the porting process, it’s essential to take some preparatory steps to ensure a smooth transition:
- Check Eligibility: Ensure that your Vodafone prepaid number is eligible for porting. You should have used the number for at least 90 days and should not have any outstanding dues.
- Backup Contacts: Back up your contacts to ensure you don’t lose any important phone numbers during the transition.
- Clear Outstanding Dues: Pay any pending bills or dues to Vodafone to avoid any complications during the porting process.
- Choose an Airtel Postpaid Plan: Research and select an Airtel postpaid plan that suits your needs. Airtel offers a variety of plans with different data and talk time options.
3. Initiating the Porting Process
Once you’ve completed the preparatory steps, it’s time to initiate the porting process. Here’s how:
- Visit the Nearest Airtel Store: Locate your nearest Airtel store and visit it with a valid photo ID, passport-sized photographs, and your Vodafone prepaid SIM card.
- Select Your Airtel Plan: At the Airtel store, discuss your requirements with the customer care representative and select the Airtel postpaid plan that best suits you.
- Fill the Porting Form: Fill out the Mobile Number Portability (MNP) form, providing accurate details about your current Vodafone number, along with the chosen Airtel plan.
- Generate Unique Porting Code (UPC): After submitting the MNP form, you’ll receive a Unique Porting Code (UPC) via SMS on your Vodafone number. This code is crucial for the porting process.
- Share the UPC with Airtel: Share the UPC with the Airtel store representative. They will initiate the porting process with the code.
4. Important Considerations during Porting
While the porting process is underway, there are some essential considerations to keep in mind:
- Porting Timeframe: The porting process typically takes 3-5 working days. During this period, you can continue using your Vodafone SIM.
- Avoid Cancelling Vodafone Services: Do not cancel your Vodafone services until the porting is complete. Cancelling prematurely can lead to complications.
- Temporary Downtime: There might be a brief period of downtime during the porting process when neither your Vodafone nor your Airtel SIM will be operational.
- Retaining Your Number: The porting process ensures that you keep your existing phone number, so you don’t need to notify your contacts of any changes.
5. Post-Porting Checklist
After your number successfully ports to Airtel, here’s a checklist to ensure a seamless transition:
- Activate Airtel SIM: Insert your new Airtel SIM card and activate it as per the instructions provided.
- Update Contacts: Update your contacts with your new Airtel number.
- Check Services: Ensure that all your services, including calls, SMS, and data, are functioning correctly on your Airtel SIM.
- Monitor Billing: Keep an eye on your first Airtel bill to ensure it matches the selected plan and usage.
6. FAQs about Porting from Vodafone to Airtel
Here are some common questions people have about porting from Vodafone to Airtel:
- How much does it cost to port my number? Porting charges are minimal and vary from one service provider to another. Airtel typically charges a nominal fee for porting.
- Can I choose any Airtel plan for porting? Yes, you can select any Airtel postpaid plan that meets your needs and budget.
- What happens to my existing Vodafone balance? Your existing Vodafone balance will not carry over to Airtel. It’s advisable to use up your Vodafone balance before porting.
Related Articles
- How to port Vodafone Postpaid number to Airtel prepaid?
- How to port number (MNP)
- Airtel Payment Bank Retailer Commission
- Airtel Payment Bank Account Opening Charges
- How to get porting code without sending SMS
Conclusion
Switching from Vodafone prepaid to Airtel postpaid or Prepaid can significantly enhance your mobile communication experience. By following the steps outlined in this guide, you can seamlessly port your number while retaining your contacts and enjoying the benefits of Airtel’s extensive network and attractive postpaid plans. Remember to research and choose the right plan for your needs, and don’t hesitate to reach out to the customer care teams of both providers for assistance during the porting process. Happy porting!
Copy URL URL Copied

Send an email 02/10/20230 93 4 minutes read
Share
Facebook X LinkedIn Tumblr Pinterest Pocket Skype Messenger Messenger ViberShare
Facebook X LinkedIn Tumblr Pinterest Reddit VKontakte Odnoklassniki Pocket Skype Share via Email Print


